There are two ways to animate in Silverlight, through storyboards and through code. Expression Blend offers extensive help in creating storyboard animations. Silverlight animation is time based not frame based, this means that your animation will benefit from running at the maximum frame rate that the users machine will allow. Multiple storyboards can be created and run at the same time, but for the purpose of this basic tutorial, you'll be shown how to create a single storyboard.

Follow these simple steps to create storyboard animation using expression blend in Silverlight:
Step 1
To create a new storyboard, go to the Objects and Timeline tab then click on the ‘plus’ icon.
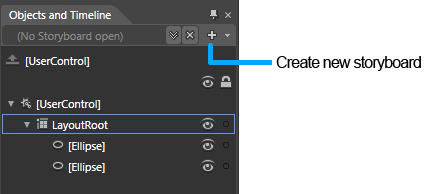
If you are using the default UI layout in Blend, you may want to hit the ‘F6‘ key to switch the layout from design mode to animation mode, this will give you a better layout for working with storyboards.
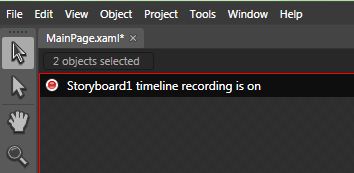
Notice that after adding a storyboard a red circle will be displayed in the top right of the screen, this indicates that you are in record mode. When in record mode, every change you make is treated as an animation and will be tied to a Keyframe. To turn record mode on or off click on the red circle in the top right of the screen, it should toggle from red to grey.
Step 2
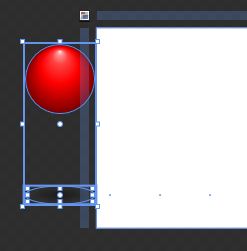
For the purpose of this tutorial I have created a ball graphic and a shadow graphic as shown below. You can use any objects thay you like to make your own animation project. I have placed them off the page to the left so that they start out of site.
Step 3
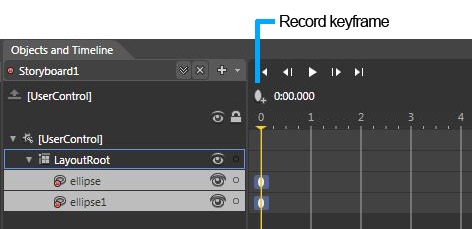
Storyboard animation is based on Keyframes set to specific times. To add a Keyframe, go back to the ‘Objects and Timeline‘ tab, select the objects that you want to animate and click the Record Keyframe button as highlighted below. You will see that a new Keyframe is added by each object at zero seconds.
Step 4
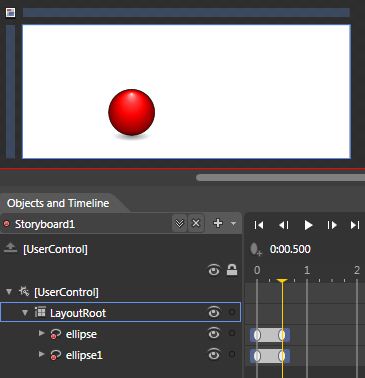
To add a Keyframe at a specific point along your timeline, drag the yellow time bar to the required point and then hit the Record Keyframe button. To make our ball graphic animate I have selected a time stamp of 0.5 seconds and moved the ball to the position shown below:
Step 5
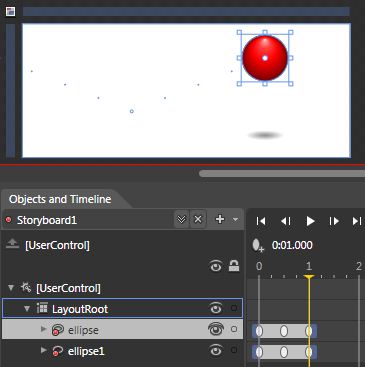
Then you can animate the ball and shadow graphics again at 1 second.
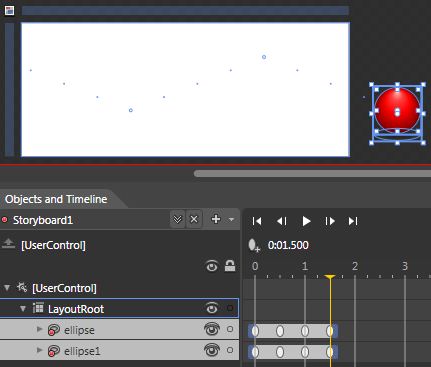
And once more at 1.5 seconds to finish the animation.
Step 6
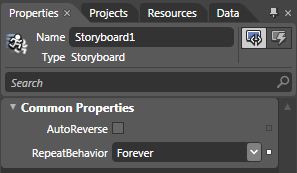
Now that we have completed the animation we may want to loop it multiple times or loop it forever. To make the animation loop, make sure you have the storyboard selected under the ‘Objects and Timeline‘ tab, then go to your ‘Properties‘ tab and scroll down to the ‘Common Properties‘ section. Here you have an option to repeat the animation several times, for this tutorial, you have to set it to ‘Forever‘.
Step 7
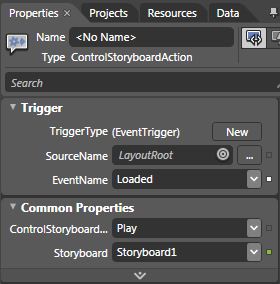
Finally, you need to tell the storyboard to play. Sometimes you will need a storyboard to be called by the code behind file, but you can use ‘Behaviors’ to start a storyboard instead. ‘Behaviors’ are pre-set actions that can be dropped onto objects in Blend, they are an easy way to achieve functionality without requiring knowledge of C# or alternative languages. To tell the storyboard to autoplay, go to the ‘Assets‘ button on the main tool bar (the last icon), select ‘Behaviors‘ from the list on the left to bring up the selection of behaviors. Find the behavior titled ‘ControlStoryboardAction‘ and drag it onto your ‘LayoutRoot‘. See how the behavior is indented below the ‘LayoutRoot‘. Select the behavior and go to the ‘Properties‘ tab, scroll down to the ‘Triggers‘ section and set the following settings:
EventName = Loaded
ControlStoryboard… = Play
Storyboard = Storyboard1 (the name of your storyboard)
You are done with your storyboard animation!
HostForLIFE.eu Silverlight 6 Hosting
HostForLIFE.eu is European Windows Hosting Provider which focuses on Windows Platform only. We deliver on-demand hosting solutions including Shared hosting, Reseller Hosting, Cloud Hosting, Dedicated Servers, and IT as a Service for companies of all sizes. We have customers from around the globe, spread across every continent. We serve the hosting needs of the business and professional, government and nonprofit, entertainment and personal use market segments.
