In this post, we will learn how to create Analog Clock completely from code behind using .NET Silverlight.

Step 1
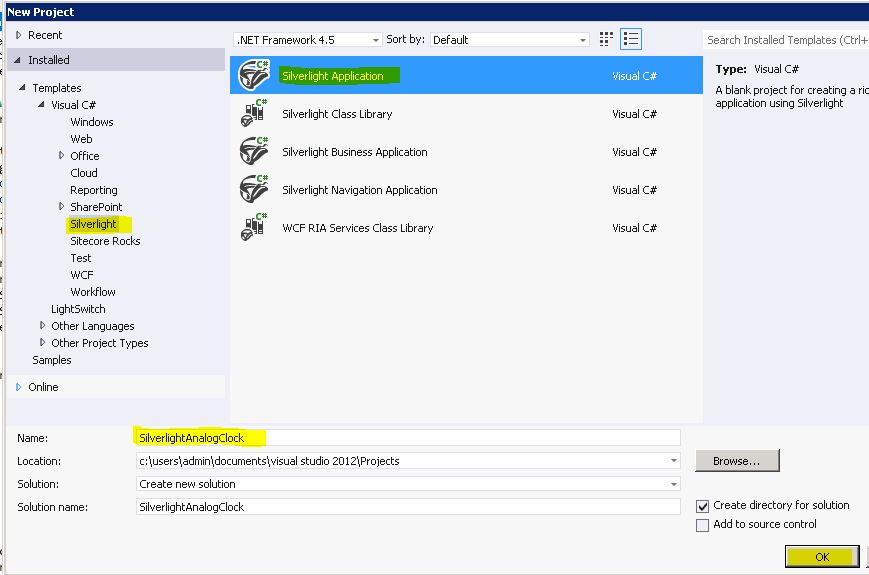
Create a new project in Visual Studio and select "Silverlight Application".
Step 2
Open MainPage.xaml and add the following code:
<UserControl x:Class="SilverlightAnalogClock.MainPage"
xmlns="http://schemas.microsoft.com/winfx/2006/xaml/presentation"
xmlns:x="http://schemas.microsoft.com/winfx/2006/xaml"
xmlns:d="http://schemas.microsoft.com/expression/blend/2008"
xmlns:mc="http://schemas.openxmlformats.org/markup-compatibility/2006"
mc:Ignorable="d"
d:DesignHeight="300" d:DesignWidth="400">
<Grid x:Name="LayoutRoot" Background="White">
</Grid>
</UserControl>
Step 3
Open MainPage.xaml.cs and add the following code:
using System;
using System.Collections.Generic;
using System.Linq;
using System.Net;
using System.Windows;
using System.Windows.Controls;
using System.Windows.Documents;
using System.Windows.Input;
using System.Windows.Media;
using System.Windows.Media.Animation;
using System.Windows.Media.Imaging;
using System.Windows.Shapes;
namespace SilverlightAnalogClock
{
public partial class MainPage : UserControl
{
public Canvas ClockArea = null;
public Rectangle secondHand = null;
public Rectangle minuteHand = null;
public Rectangle hourHand = null;
public RotateTransform secondHandRotate = null;
public RotateTransform minuteHandRotate = null;
public RotateTransform hourHandRotate = null;
public Ellipse outerCircle = null;
public Point centerPoint;
public double HEIGHT = 0;
public double WIDTH = 0;
public double RADIUS = 0;
public MainPage()
{
InitializeComponent();
ClockArea = new Canvas()
{
Width = 300,
Height = 300,
HorizontalAlignment = HorizontalAlignment.Left,
VerticalAlignment = VerticalAlignment.Top
};
ClockArea.SetValue(Grid.RowProperty, 0);
ClockArea.SetValue(Grid.ColumnProperty, 0);
ClockArea.Margin = new Thickness(0, 0, 0, 0);
this.LayoutRoot.Children.Add(ClockArea);
WIDTH = ClockArea.Width;
HEIGHT = ClockArea.Height;
centerPoint.X = (WIDTH/2);
centerPoint.Y = (HEIGHT/2);
RADIUS = 400;
DrawClockFace();
Point TOPPOINT = new Point(0, 0);
DrawMinuteHand();
DrawSecondHand();
DrawHourHand();
DrawCenterCircle();
//Start the Clock
ClockStart();
}
public void ClockStart()
{
// Create and Start the Thread Timer
System.Windows.Threading.DispatcherTimer clockTimer = new System.Windows.Threading.DispatcherTimer();
clockTimer.Interval = new TimeSpan(0, 0, 0, 0, 1000);
clockTimer.Tick += new EventHandler(Clock_Tick);
clockTimer.Start();
}
// Get and Set the Angles of Each Hand at every Clock Ticks
public void Clock_Tick(object o, EventArgs sender)
{
double hourRotateValue = Convert.ToDouble(DateTime.Now.Hour.ToString());
double minuteRotateValue = Convert.ToDouble(DateTime.Now.Minute.ToString());
double secondRotateValue = Convert.ToDouble(DateTime.Now.Second.ToString());
hourRotateValue = (hourRotateValue + minuteRotateValue / 60) * 30;
minuteRotateValue = (minuteRotateValue + secondRotateValue / 60) * 6;
secondRotateValue = Convert.ToDouble(DateTime.Now.Second.ToString()) * 6;
minuteHandRotate.Angle = minuteRotateValue;
hourHandRotate.Angle = hourRotateValue;
secondHandRotate.Angle = secondRotateValue;
}
// Draw Center Circle
public void DrawCenterCircle()
{
Ellipse centerCircle = new Ellipse()
{
Width = 10,
Height = 10,
Stroke = new SolidColorBrush(Colors.Red),
Fill = new SolidColorBrush(Colors.Red),
HorizontalAlignment = HorizontalAlignment.Center,
VerticalAlignment = VerticalAlignment.Center
};
centerCircle.SetValue(Grid.RowProperty, 0);
centerCircle.SetValue(Grid.ColumnProperty, 0);
Canvas.SetLeft(centerCircle, (WIDTH / 2) - (centerCircle.Width / 2));
Canvas.SetTop(centerCircle, (HEIGHT / 2) - (centerCircle.Height / 2));
ClockArea.Children.Add(centerCircle);
}
// Draw Clock Face
public void DrawClockFace()
{
int smallCircle = 5;
Color c = Colors.Blue;
int p = 0;
// Draw Shadow of Outer Circle
Ellipse outerCircleShadow = new Ellipse()
{
Width = (WIDTH),
Height = (WIDTH),
Stroke = new SolidColorBrush(Colors.Gray),
StrokeThickness = 5,
HorizontalAlignment = HorizontalAlignment.Center,
VerticalAlignment = VerticalAlignment.Center
};
outerCircleShadow.SetValue(Grid.RowProperty, 0);
outerCircleShadow.SetValue(Grid.ColumnProperty, 0);
Canvas.SetLeft(outerCircleShadow, (WIDTH / 2) - (outerCircleShadow.Width / 2) + 6.5);
Canvas.SetTop(outerCircleShadow, (HEIGHT / 2) - (outerCircleShadow.Height / 2) + 6.5);
ClockArea.Children.Add(outerCircleShadow);
// Draw Outer Circle
outerCircle = new Ellipse()
{
Width = (WIDTH ),
Height = (WIDTH),
Stroke = new SolidColorBrush(Colors.Black),
StrokeThickness = 5,
HorizontalAlignment = HorizontalAlignment.Center,
VerticalAlignment = VerticalAlignment.Center
};
outerCircle.SetValue(Grid.RowProperty, 0);
outerCircle.SetValue(Grid.ColumnProperty, 0);
Canvas.SetLeft(outerCircle, (WIDTH / 2) - (outerCircle.Width / 2) + 4.5);
Canvas.SetTop(outerCircle, (HEIGHT / 2) - (outerCircle.Height / 2) + 4.5);
ClockArea.Children.Add(outerCircle);
outerCircle.Fill = new LinearGradientBrush()
{
EndPoint = new Point(1, 0),
GradientStops = new GradientStopCollection()
{
new GradientStop() { Color = Colors.White, Offset = 0 },
new GradientStop() { Color = Colors.Gray, Offset = 0.5 },
new GradientStop() { Color = Colors.White, Offset = 1 }
}
};
int clockDigits = 3;
double rad = (WIDTH/2) - 10.0f;
// 60 Innner Dots as Small Circle
for (double i = 0.0; i < 360.0; i += 6)
{
double angle = i * System.Math.PI / 180;
int x = (int)(centerPoint.X + rad * System.Math.Cos(angle));
int y = (int)(centerPoint.Y + rad * System.Math.Sin(angle));
if (p % 5 == 0)
{
smallCircle = 10;
c = Colors.Orange;
}
else
{
smallCircle = 5;
c = Colors.Blue;
}
if (p % 15 == 0)
{
TextBlock tb = new TextBlock();
tb.Text = clockDigits.ToString();
tb.FontSize = 24;
tb.SetValue(Grid.RowProperty, 0);
tb.SetValue(Grid.ColumnProperty, 0);
Canvas.SetLeft(tb, x );
Canvas.SetTop(tb, y);
if (clockDigits == 3)
{
Canvas.SetLeft(tb, x - 20);
Canvas.SetTop(tb, y - 10);
}
if (clockDigits == 6)
{
Canvas.SetLeft(tb, x);
Canvas.SetTop(tb, y - 30);
}
if (clockDigits == 9)
{
Canvas.SetLeft(tb, x + 15);
Canvas.SetTop(tb, y - 10);
}
if (clockDigits == 12)
{
Canvas.SetLeft(tb, x - 10);
Canvas.SetTop(tb, y + 5 );
}
ClockArea.Children.Add(tb);
clockDigits = clockDigits + 3;
}
p++;
Ellipse innerPoints = new Ellipse()
{
Width = smallCircle,
Height = smallCircle,
Stroke = new SolidColorBrush(c),
Fill = new SolidColorBrush(c),
HorizontalAlignment = HorizontalAlignment.Center,
VerticalAlignment = VerticalAlignment.Center
};
innerPoints.SetValue(Grid.RowProperty, 0);
innerPoints.SetValue(Grid.ColumnProperty, 0);
Canvas.SetLeft(innerPoints, x);
Canvas.SetTop(innerPoints, y);
ClockArea.Children.Add(innerPoints);
}
}
// Draw the Second Hand
public void DrawSecondHand()
{
double handLength = (HEIGHT / 2) - 20;
secondHand = new Rectangle()
{
Width = 1,
Height = handLength,
Stroke = new SolidColorBrush(Colors.Red),
Fill = new SolidColorBrush(Colors.Red),
HorizontalAlignment = HorizontalAlignment.Center,
VerticalAlignment = VerticalAlignment.Center
};
secondHand.SetValue(Grid.RowProperty, 0);
secondHand.SetValue(Grid.ColumnProperty, 0);
//Add Rotate Transformation
secondHandRotate = new RotateTransform();
secondHandRotate.Angle = 0;
//Set Center for Rotation
secondHandRotate.CenterX = Canvas.GetLeft(secondHand);
secondHandRotate.CenterY = secondHand.Height;
secondHand.RenderTransform = secondHandRotate;
//Set Initial Position of Hand
Canvas.SetTop(secondHand, centerPoint.Y - handLength);
Canvas.SetLeft(secondHand, WIDTH/2);
ClockArea.Children.Add(secondHand);
}
public void DrawMinuteHand()
{
double handLength = (HEIGHT / 2) - 50;
minuteHand = new Rectangle()
{
Width = 4,
Height = handLength,
Stroke = new SolidColorBrush(Colors.Black),
Fill = new SolidColorBrush(Colors.Black),
HorizontalAlignment = HorizontalAlignment.Center,
VerticalAlignment = VerticalAlignment.Center
};
minuteHand.SetValue(Grid.RowProperty, 0);
minuteHand.SetValue(Grid.ColumnProperty, 0);
minuteHandRotate = new RotateTransform();
minuteHandRotate.Angle = 0;
minuteHandRotate.CenterX = Canvas.GetLeft(minuteHand);
minuteHandRotate.CenterY = minuteHand.Height;
minuteHand.RenderTransform = minuteHandRotate;
Canvas.SetTop(minuteHand, centerPoint.Y - handLength);
Canvas.SetLeft(minuteHand, WIDTH / 2);
ClockArea.Children.Add(minuteHand);
}
public void DrawHourHand()
{
double handLength = (HEIGHT / 2) - 80;
hourHand = new Rectangle()
{
Width = 4,
Height = handLength,
Stroke = new SolidColorBrush(Colors.Black),
Fill = new SolidColorBrush(Colors.Black),
HorizontalAlignment = HorizontalAlignment.Center,
VerticalAlignment = VerticalAlignment.Center
};
hourHand.SetValue(Grid.RowProperty, 0);
hourHand.SetValue(Grid.ColumnProperty, 0);
hourHandRotate = new RotateTransform();
hourHandRotate.Angle = 0;
hourHandRotate.CenterX = Canvas.GetLeft(hourHand);
hourHandRotate.CenterY = hourHand.Height;
hourHand.RenderTransform = hourHandRotate;
Canvas.SetTop(hourHand, centerPoint.Y - handLength);
Canvas.SetLeft(hourHand, WIDTH / 2);
ClockArea.Children.Add(hourHand);
}
}
}
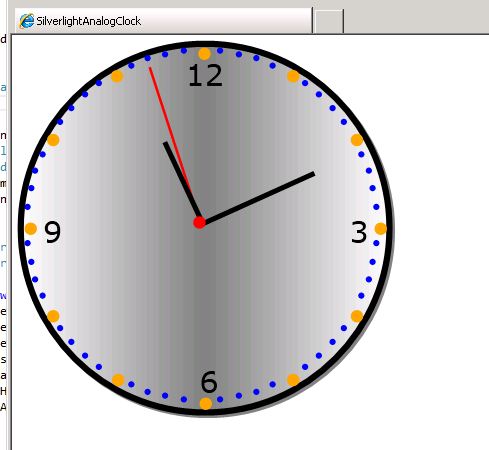
The Output
Now execute and you will get a fully drawn Silverlight Analog Clock.
HostForLIFE.eu Silverlight 6 Hosting
HostForLIFE.eu is European Windows Hosting Provider which focuses on Windows Platform only. We deliver on-demand hosting solutions including Shared hosting, Reseller Hosting, Cloud Hosting, Dedicated Servers, and IT as a Service for companies of all sizes. We have customers from around the globe, spread across every continent. We serve the hosting needs of the business and professional, government and nonprofit, entertainment and personal use market segments.
